Diviner analysis
Diviner Analysis Window
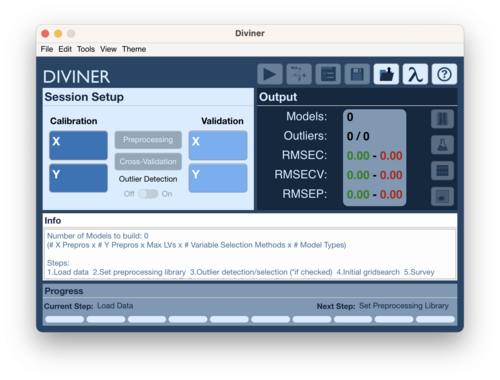
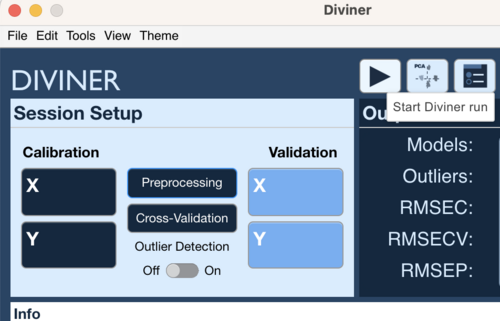
The Diviner Analysis window serves as the main interface to perform a diviner run.
Using the Diviner Analysis window
Loading Data
There are several methods to load data into the Diviner analysis window. As of version 9.5 the Diviner analysis window does not allow importing data directly from a spreadsheet or other file format. This must be done before hand and the resulting DataSet Object must be present in the Workspace Browser. Please see this wiki page for importing data into: Importing Data and this webinar: Importing Data Webinar
To Load Data
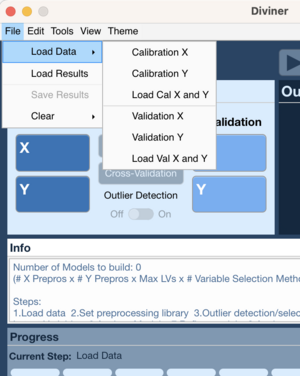
File Menu 1
- Go to File → Load Data → Calibration X (or Validation X)
- Choose data to load for X block
- Go to File → Load Data → Calibration Y (or Validation Y)
- Choose data to load for Y block
File Menu 2
- Go to File → Load Data → Cal X and Y (or Val X and Y)
- Choose data for X block
- Choose data for Y block
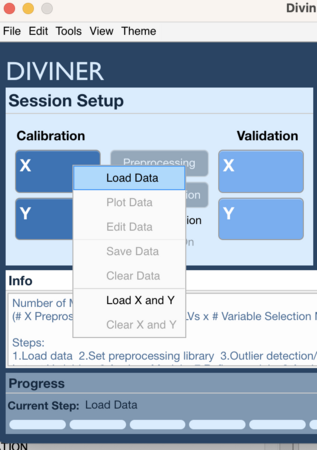
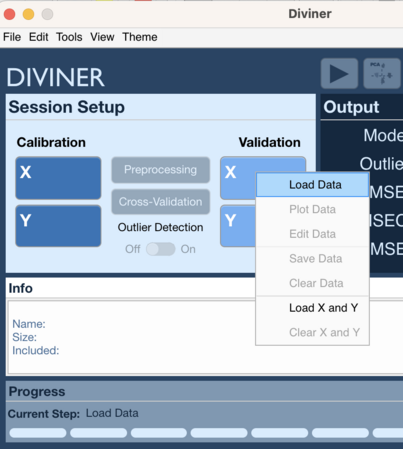
Context Menu 1
- Right click on Calibration X block (or Validation X block)
- Select Load Data
- Choose data to load for X block
- Right click on Calibration Y block (or Validation Y block)
- Select Load Data
- Choose data to load for Y block
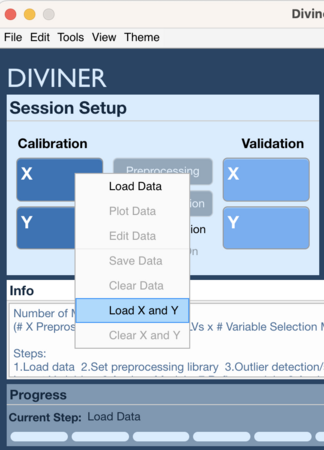
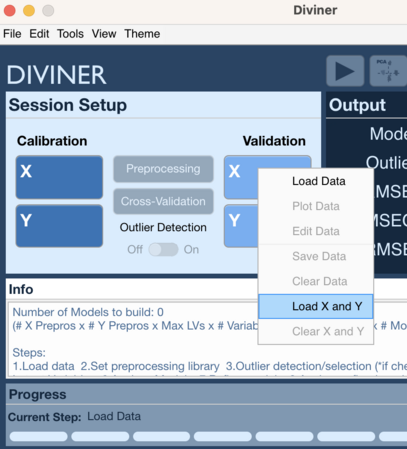
Context Menu 2
- Right click on Calibration X block or Calibration Y block (or Validation X block or Validation Y block)
- Select Load X and Y
- Choose data to load for X block
- Choose data to load for Y block
Select Calibration Y Column
If the Calibration Y block is multivariate then a single Y variable must be selected for modeling:
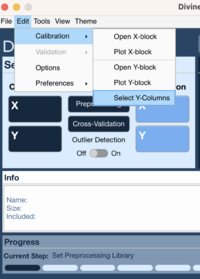
Method One
- Go to Edit → Calibration → Select Y-Column
- Select Y variable to use for modeling
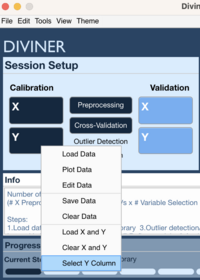
Method Two
- Right click on Calibration Y block
- Choose Select Y Column
- Select Y variable to use for modeling
Set Preprocessing Recipes
Once data has been loaded, the next step is to set the Preprocessing recipes to be used by Diviner to build the models. Click on the Preprocessing button to open the Diviner Preprocessing window. Please see this page for more information about the Diviner Preprocessing interface: diviner preprocessing interface. The collection of recipes will be referred to as a library.
Cross-Validation
Review and modify the cross-validation settings using the Cross-Validation button. Please this page for more information on using cross-validation: cross-validation. The default is set to Venetian Blinds with 5 splits.
Outlier Detection
If the preprocessing library contains recipes to use for outlier detection then sse the Outlier Detection On/Off toggle to set if Outlier detection should be performed.
Starting a Diviner
To start a Diviner run, click on the "Start Diviner Run" button.
Review Results
This section is under construction
Diviner Buttons
This section is under construction
