MIA Toolbox Loading Data Quick Start: Difference between revisions
Jump to navigation
Jump to search
imported>Scott No edit summary |
imported>Scott No edit summary |
||
| Line 12: | Line 12: | ||
|- | |- | ||
|valign="top" | | |valign="top" | | ||
[[Image: | [[Image:LoadImageDialog.png|right|500px|(Click to Enlarge)]] | ||
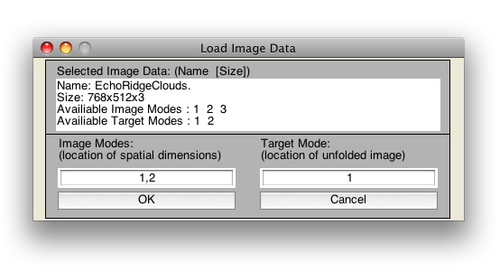
The | The '''Load Image Data''' dialog box will appear. This interface allows you to choose how to unfold the image data. The defaults are set for typical image data (pixels by pixels by variable, RGB slabs in the case) so just click '''OK'''. | ||
|- | |||
|valign="top" | | |||
[[Image:ImageGUIWithClouds.png|right|300px|(Click to Enlarge)]] | |||
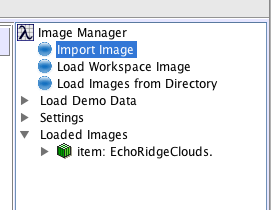
The image will appear in '''Tree''' at the '''Loaded Images''' leaf. Clicking on it will display the image in the main editing pain. | |||
|} | |} | ||
[[Building Models Quick Start | Next Topic: Building Models]] | [[Building Models Quick Start | Next Topic: Building Models]] | ||
Revision as of 14:54, 8 October 2009
|
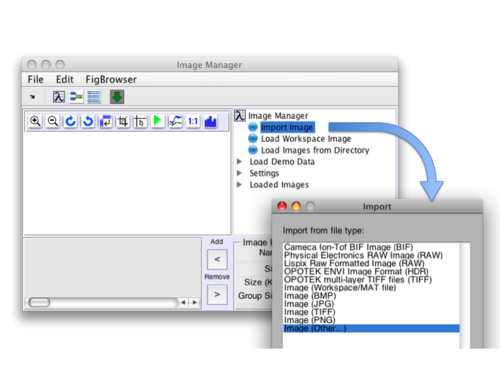
Image data can be readily imported into the Image Manger by clicking Import Image from the Tree or File Menu. We'll select Image (Other...) so all image types enabled in the dialog box. In this example we'll import a .JPEG image, "EchoRidgeClouds.jpeg", included with MIA_Toolbox. |
|
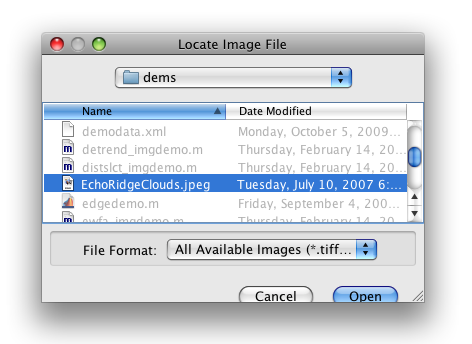
Use the resulting dialog box to select the "EchoRidgeClouds.jpeg" file from the dems folder. |
|
The Load Image Data dialog box will appear. This interface allows you to choose how to unfold the image data. The defaults are set for typical image data (pixels by pixels by variable, RGB slabs in the case) so just click OK. |
|
The image will appear in Tree at the Loaded Images leaf. Clicking on it will display the image in the main editing pain. |


