Clsti model builder: Difference between revisions
| Line 100: | Line 100: | ||
==Build CLSTI Model== | ==Build CLSTI Model== | ||
To build a model, click on the light green '''Build Model''' button. The button will turn a dark green and the '''Save Model''' and '''Send Model to Analysis window''' icons will become enabled. | |||
[[Image: Clsti_model_builder_model_built.png | 500px]] | |||
==Save Model to the Workspace== | ==Save Model to the Workspace== | ||
Revision as of 14:48, 6 December 2023
CLSTI Model Builder How To
This page describes how to use the CLSTI Model Builder interface.

This interface can be accessed by:
- From the MATLAB command line, use the commands:
clsti('builder'), orclsti_gui
- From the CLSTI Analysis interface:
- Click on the Open CLSTI Model Builder button

Load Data
Follow these steps to load pure component data to use to build a CLSTI model:
- Use the
 button to add an empty Component tab.
 - Right click on the new tab and choose the appropriate format to load your data. Choose from:
- Definition file, or
- DataSet Object

Definition File
Definition files must be formatted in a specific way for the import to work correctly. They must be in .csv, .txt, or .xlsx format and consist of two columns, where the fist column contains in the file names corresponding the data files and the second column contains the temperatures at which that pure component spectrum was collected. Here is an example definition file for Acetone in .csv format:
  Acetone,
  Acetone_25C.spc,25
  Acetone_40C.spc,40
  Acetone_55C.spc,55
  Acetone_70C.spc,70
Important things to note:
- The pure component name should be in the fist element (row 1, column 1) of the definition file
- It is recommended that the data files (Acetone_25C.spc, etc.) be in the same folder as the definition file
- If not in the same folder then the file names should include the full path to the data file (example: myFolder1/myFolder2/Acetone_25C.spc)
DataSet Object
DataSet Objects must also be configured in a specific way for importing to work correctly. It is expected that the pure component temperatures are in the first axis scale set of the rows (mode 1). Example:

Important note: If variable selection is not performed using the Variable Selection button, then the variables used in the model will correspond to the included variables in the first DSO that is loaded.
Successfully Loaded Pure Component Tab
When pure component data has been successfully loaded, the interface will look like this:

where the Build Model, Variable Selection, and ![]() buttons are enabled. Use the
buttons are enabled. Use the ![]() button to remove the currently selected tab. The Overview tab cannot be removed.
button to remove the currently selected tab. The Overview tab cannot be removed.
The Open button can be used to open the pure component data in a DataSet Editor which can be useful for plotting.
Overview Tab
The Overview tab shows all loaded pure components and included temperatures. Here is an example of the Overview tab after loading a second component, Ethanol:

Removing a pure component tab will remove the component from the Overview tab.
The Open button will open a DataSet Editor containing all pure component data.
Include/Exclude Pure Component Samples
On each pure component tab there is a column for setting what samples (pure component at certain temperatures) to include in the model building process. Unchecking a sample will exclude it from the model. Here is an example of excluding the pure component spectrum for Acetone at 40C and the corresponding Overview tab with that temperature removed:
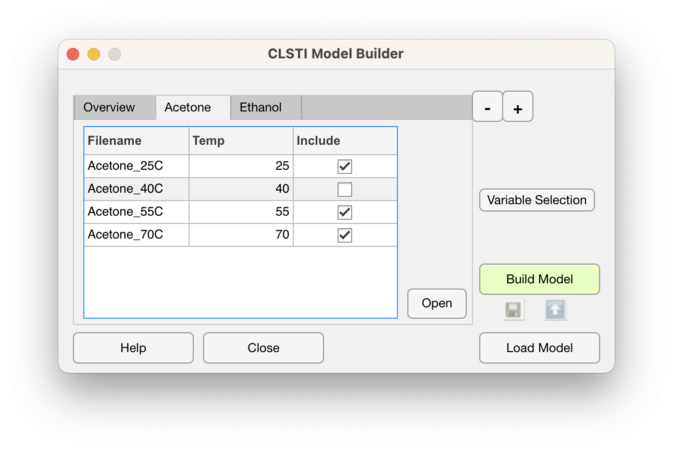
Acetone at 40C excluded
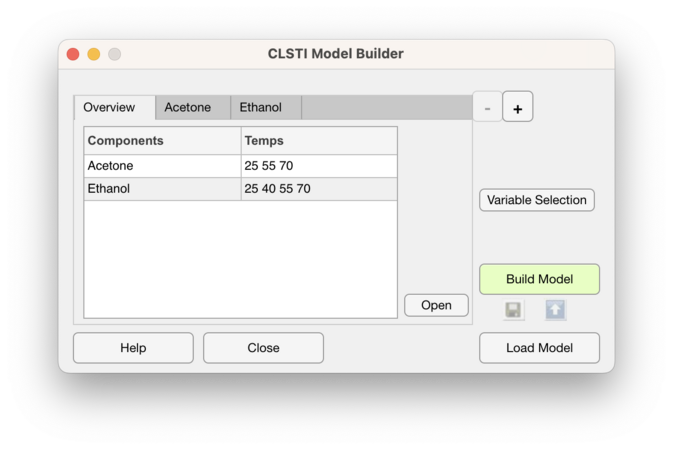
Updated Overview tab with Acetone at 40C removed


If loading a DataSet Object that has samples excluded, the pure component tab will preserve that exclusion.
Variable Selection
Use the Variable Selection button to the select the variables to include in the model building process.
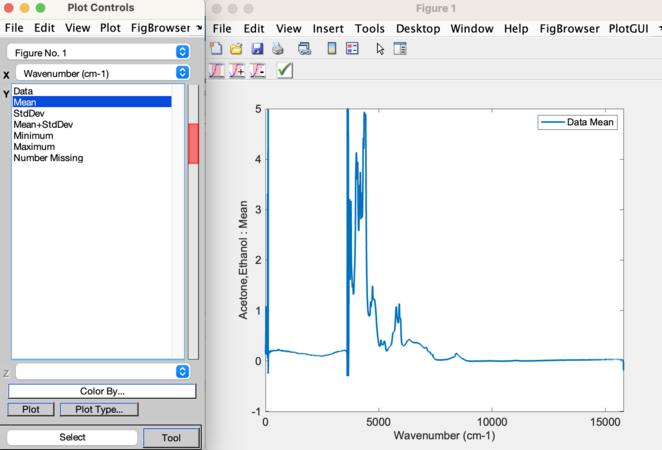
Plotting mean of data

Plotting all data


Use the selection tools in the toolbar to perform the variable selection:
- The left most button will include only the variables that are selected
- The next button (with the plus sign) will add selected variables to the currently included variables
- The next button (with the minus sign) will remove the selected variables from the included variables
- The green check mark will accept the changes and close the figure
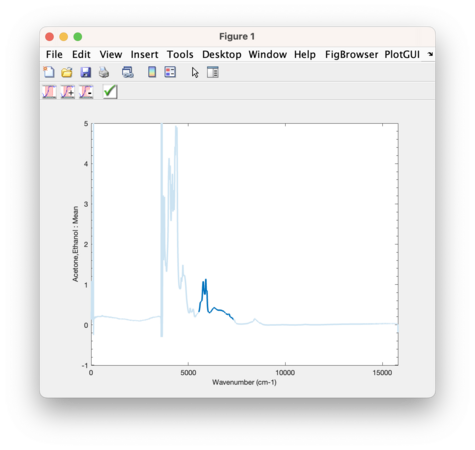
Plot of selected variables to include
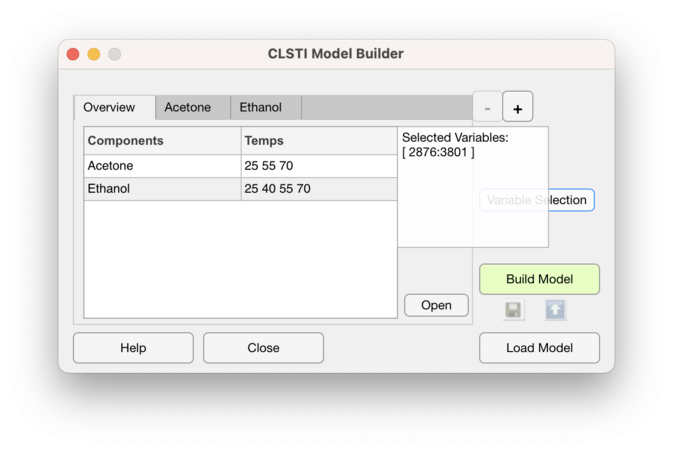
CLSTI Model Builder interface showing selected variables


When hovering over the Variable Selection button a info box will appear showing the currently included region.
Build CLSTI Model
To build a model, click on the light green Build Model button. The button will turn a dark green and the Save Model and Send Model to Analysis window icons will become enabled.
